
.
This tutorial is based on https://github.com/codepath/android_guides/wiki/Google-Play-Style-Tabs-using-TabLayout and it was implemented on Android Studio version 1.4.
This tutorial, however, is slightly different from the above reference as it implements three fragment pages instead of a single fragment page.

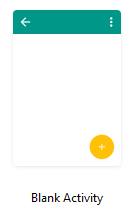
1) In Android Studio, create a New Blank Activity Project.
2) Edit your build.grade (Module:app) file so that it contains the dependencies.
e.g.
File Name: build.gradle (Module:app)
dependencies {
compile fileTree(dir: 'libs', include: ['*.jar'])
testCompile 'junit:junit:4.12'
compile 'com.android.support:appcompat-v7:23.1.0'
compile 'com.android.support:design:23.1.0'
}
|
3) Add View Pager and Tab Layout to the Layout File
Blank Activity Project generates a nested layout i.e activity_main.xml containing content_main.xml.
We will edit content_main.xml to implement View Pager and Tab Layout.
|
File Name: content_main.xml
<?xml version="1.0" encoding="utf-8"?>
<LinearLayout xmlns:android="http://schemas.android.com/apk/res/android"
xmlns:tools="http://schemas.android.com/tools"
xmlns:app="http://schemas.android.com/apk/res-auto"
android:layout_width="match_parent"
android:layout_height="match_parent"
app:layout_behavior="@string/appbar_scrolling_view_behavior"
tools:showIn="@layout/activity_main"
tools:context=".MainActivity"
android:orientation="vertical">
<android.support.design.widget.TabLayout
android:id="@+id/sliding_tabs"
android:layout_width="match_parent"
android:layout_height="wrap_content"
android:background="?attr/colorPrimary"
android:elevation="6dp"
android:minHeight="?attr/actionBarSize"
android:theme="@style/ThemeOverlay.AppCompat.Dark.ActionBar"/>
<android.support.v4.view.ViewPager
android:id="@+id/viewpager"
android:layout_width="match_parent"
android:layout_height="fill_parent"
android:layout_below="@id/sliding_tabs"/>
</LinearLayout>
|
4) Define the Page Fragments Layout
For this tutorial, we will create three fragment pages.
|
File name: res/layout/fragment_page1.xml
<?xml version="1.0" encoding="utf-8"?>
<LinearLayout xmlns:android="http://schemas.android.com/apk/res/android"
android:layout_width="match_parent"
android:layout_height="match_parent"
android:orientation="vertical">
<TextView
android:layout_width="match_parent"
android:layout_height="wrap_content"
android:gravity="center_horizontal"
android:text="REPORT" />
</LinearLayout>
|
File name: res/layout/fragment_page2.xml
<?xml version="1.0" encoding="utf-8"?>
<LinearLayout xmlns:android="http://schemas.android.com/apk/res/android"
android:layout_width="match_parent"
android:layout_height="match_parent"
android:orientation="vertical">
<TextView
android:layout_width="match_parent"
android:layout_height="wrap_content"
android:gravity="center_horizontal"
android:text="UPDATE" />
</LinearLayout>
|
File name: res/layout/fragment_page3.xml
<?xml version="1.0" encoding="utf-8"?>
<LinearLayout xmlns:android="http://schemas.android.com/apk/res/android"
android:layout_width="match_parent"
android:layout_height="match_parent"
android:orientation="vertical">
<TextView
android:layout_width="match_parent"
android:layout_height="wrap_content"
android:gravity="center_horizontal"
android:text="NEWS" />
</LinearLayout>
|
5) Create Page Controller.
The role of Page Controller is to inflate ie to read page structure definition from XML file and insert the structure into the application.
|
File Name: FragmentPage1.java
package com.notarazi.myviewpagertablayout1;
import android.os.Bundle;
import android.support.v4.app.Fragment;
import android.view.LayoutInflater;
import android.view.View;
import android.view.ViewGroup;
public class FragmentPage1 extends Fragment {
@Override
public View onCreateView(LayoutInflater inflater, ViewGroup container,
Bundle savedInstanceState) {
return inflater.inflate(R.layout.fragment_page1, null);
}
}
|
File Name: FragmentPage2.java
package com.notarazi.myviewpagertablayout1;
import android.os.Bundle;
import android.support.v4.app.Fragment;
import android.view.LayoutInflater;
import android.view.View;
import android.view.ViewGroup;
public class FragmentPage2 extends Fragment {
@Override
public View onCreateView(LayoutInflater inflater, ViewGroup container,
Bundle savedInstanceState) {
return inflater.inflate(R.layout.fragment_page2, null);
}
}
|
File Name: FragmentPage3.java
package com.notarazi.myviewpagertablayout1;
import android.os.Bundle;
import android.support.v4.app.Fragment;
import android.view.LayoutInflater;
import android.view.View;
import android.view.ViewGroup;
public class FragmentPage3 extends Fragment {
@Override
public View onCreateView(LayoutInflater inflater, ViewGroup container,
Bundle savedInstanceState) {
return inflater.inflate(R.layout.fragment_page3, null);
}
}
|
6) Create Controller to handle the Fragment Page Controllers
package com.notarazi.myviewpagertablayout1;
import android.content.Context;
import android.os.Bundle;
import android.support.v4.app.Fragment;
import android.support.v4.app.FragmentManager;
import android.support.v4.app.FragmentPagerAdapter;
public class MainFragmentPagerAdapter extends FragmentPagerAdapter {
final int PAGE_COUNT = 3;
private String tabTitles[] = new String[] { "REPORT", "UPDATE", "NEWS" };
private Context context;
public MainFragmentPagerAdapter(FragmentManager fm, Context context) {
super(fm);
this.context = context;
}
@Override
public int getCount() {
return PAGE_COUNT;
}
@Override
public Fragment getItem(int arg0) {
Bundle data = new Bundle();
switch(arg0){
/** tab1 is selected */
case 0:
FragmentPage1 fragmentpage1 = new FragmentPage1();
return fragmentpage1;
/** tab2 is selected */
case 1:
FragmentPage2 fragmentpage2 = new FragmentPage2();
return fragmentpage2;
/** tab3 is selected */
case 2:
FragmentPage3 fragmentpage3 = new FragmentPage3();
return fragmentpage3;
}
return null;
}
@Override
public CharSequence getPageTitle(int position) {
// Generate title based on item position
return tabTitles[position];
}
}
|
7) Update Main Controller
File Name: MainActivity.java
package com.notarazi.myviewpagertablayout1;
import android.os.Bundle;
import android.support.design.widget.FloatingActionButton;
import android.support.design.widget.Snackbar;
import android.support.design.widget.TabLayout;
import android.support.v4.view.ViewPager;
import android.support.v7.app.AppCompatActivity;
import android.support.v7.widget.Toolbar;
import android.view.Menu;
import android.view.MenuItem;
import android.view.View;
public class MainActivity extends AppCompatActivity {
@Override
protected void onCreate(Bundle savedInstanceState) {
super.onCreate(savedInstanceState);
setContentView(R.layout.activity_main);
Toolbar toolbar = (Toolbar) findViewById(R.id.toolbar);
setSupportActionBar(toolbar);
// Get the ViewPager and set it's PagerAdapter so that it can display items
ViewPager viewPager = (ViewPager) findViewById(R.id.viewpager);
viewPager.setAdapter(new MainFragmentPagerAdapter(getSupportFragmentManager(),
MainActivity.this));
// Give the TabLayout the ViewPager
TabLayout tabLayout = (TabLayout) findViewById(R.id.sliding_tabs);
tabLayout.setupWithViewPager(viewPager);
//FloatingActionButton
FloatingActionButton fab = (FloatingActionButton) findViewById(R.id.fab);
fab.setOnClickListener(new View.OnClickListener() {
@Override
public void onClick(View view) {
Snackbar.make(view, "Replace with your own action", Snackbar.LENGTH_LONG)
.setAction("Action", null).show();
}
});
}
@Override
public boolean onCreateOptionsMenu(Menu menu) {
// Inflate the menu; this adds items to the action bar if it is present.
getMenuInflater().inflate(R.menu.menu_main, menu);
return true;
}
@Override
public boolean onOptionsItemSelected(MenuItem item) {
// Handle action bar item clicks here. The action bar will
// automatically handle clicks on the Home/Up button, so long
// as you specify a parent activity in AndroidManifest.xml.
int id = item.getItemId();
//noinspection SimplifiableIfStatement
if (id == R.id.action_settings) {
return true;
}
return super.onOptionsItemSelected(item);
}
}
|
8) Run.
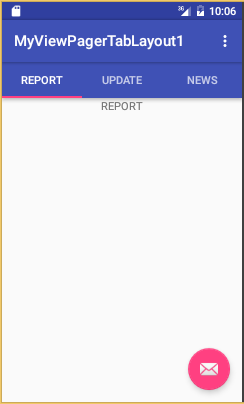
(Running in Emulator)
DOWNLOAD: MyViewPagerTabLayout1.zip
.
No comments:
Post a Comment