Android Developer Toolkit (ADT) is a free software available at
https://developer.android.com/sdk/index.html
Download the ADT bundle zip file from the above URL, unzip and run the program called eclipse. This applies to all platforms (Windows, Mac and Linux).
-----
1) RUN ADT
1.1) Run Android ADT Bundle (v21.0.1-543035)
1.2) Close Welcome Panel.
2) CREATE NEW PROJECT
2.1) Go to menu File/New/Android Application Project
2.2) New Android Application (Names and SDK Versions)
Application Name: Greetings
Project Name: Greetings
Package Name: com.example.greetings
Minimum Required SDK: API 8: Android 2.2 (Froyo)
Target SDK: API 17: Android 4.2 (Jelly Bean)
Compile With: API 17: Android 4.2 (Jelly Bean)
Theme: Holo Light with Dark Action Bar
2.3) New Android Application (Project Configuration)
Accept Default.
2.4) New Android Application (Launcher Icon)
2.5) New Android Application (Create Activity)
2.6) New Android Application (Activity Layout)
2.7) Done.
2.7.1) activity_main.xml is selected by default.
2.7.2) the file content is displayed in the form of Graphical Layout.
3) EDIT THE (LAYOUT) VIEW
3.1) Notice that initially the layout contains a label “Hello World!”.
3.2) Click to select the label.
Press [Delete] button to delete the label.
3.3) In the Layouts section of Palette, click and drag LinearLayout (Vertical) to the top left corner of the main layout.
3.4) Find the Outline Panel.
Notice that there is a warning icon.
If you hover your mouse over the icon, the explanation message pops up.
We will add child objects into this layout.
3.5) Find the abc Text Fields object in the Palette.
3.6) Click the object and drag it into the LinearLayout item in the Outline Panel.
3.7) Outcome:
3.8) Find the button object in the Palette.
3.9) Drag it into LinearLayout and place it under editText1 object as follows:
3.10) Your view will look like below:
3.11) Save.
3.12) Switch to activity_main.xml tab.
You should see the following codes:
<RelativeLayout xmlns:android="http://schemas.android.com/apk/res/android"
xmlns:tools="http://schemas.android.com/tools"
android:layout_width="match_parent"
android:layout_height="match_parent"
tools:context=".MainActivity" >
<LinearLayout
android:layout_width="wrap_content"
android:layout_height="wrap_content"
android:layout_alignParentLeft="true"
android:layout_alignParentTop="true"
android:orientation="vertical" >
<EditText
android:id="@+id/editText1"
android:layout_width="match_parent"
android:layout_height="wrap_content" >
<requestFocus />
</EditText>
<Button
android:id="@+id/button1"
android:layout_width="wrap_content"
android:layout_height="wrap_content"
android:text="Button" />
</LinearLayout>
</RelativeLayout>
Take note of the highlighted (id) texts, i.e editText1 and button1.
Later, we will use these id names to bind Java codes to the XML layout.
4) VIEW JAVA CODES
4.1) In the Package Explorer panel, find the source file MainActivity.java.
4.2) Double-click the file name.
Notice two panels.
4.2.1) Main Panel.
4.2.2) Outline Panel.
Note: To show line numbers for code editor:
Go to menu Windows/Preferences,
Click Editors/Text Editors,
Select Show line numbers.
5) UNDERSTANDING JAVA CODES
This section assumes that you are totally new to Java Language.
5.1) The Outline Panel shows the structure of a typical Java Code File (technically called Java Class File)
The code structure is divided into 3 parts.
Part 1: Package name (written in reverse-DNS form). This is a unique name representing your project.
Part 2: Import Declarations. Think of this as code libraries from which you may import methods (functions) for your programming solutions.
- android.app.Activity is a class used to represent a single screen with a user interface.
- android.app.Bundle is a class used for passing data between activities.
- android.app.Menu is a class used to provide menu options related to an application.
Part 3: The MainActivity Definition. This is where you specify what you would want the computer to do.
In the above example, you have instructions for the event onCreate and onCreateOptionsMenu, i.e.
Event onCreate = when the activity is created
Event onCreateOptionsMenu = when the OptionsMenu is created
5.2) The Main Panel shows the codes in Java Syntax.
There are few things to learn from the codes:
- Related codes are grouped within { } symbols. They can be nested as well.
- Java implements object oriented programming concept. You will see a lot of dot-style notation e.g. android.os.Bundle.
- New class (child) can be created from the existing class (parent). The child inherits the properties and methods of the parent. E.g. MainActivity will inherit whatever properties and methods of Activity class. This promotes code-reusability.
- The keyword “super” is used to initialize the object based on the parent’s method first.
- If the child class would want to modify some methods inherited from the parent class, it can “override” (refer line no. 9 and 15) them with different instructions. E.g. (line no.12) setContentView with the res/layout/activity_main.xml file and (line no.18) getMenuInflater by inflating values from res/menu/activity_main.
6) EDITING JAVA CODES
6.1) Initially, XML Layout and Java Codes are not related and thus they do not know one another. Objects in the XML Layout (e.g. editText1 and button1) must be identified first before they can be processed by Java Codes.
6.2) Let’s say we want …
the button to respond to clicks by …
popping up a message containing text entered by user in the text field.
6.3) We need the following algorithm:
(blue colour text refers to the codes in Step 6.4)
1) Bind a button object to the button layout identified by button1. (line no.13)
2) Attach an onClickListener (a method to listen for click events) method to the button. (line no.14)
3) Override the onClick (a method to respond to click events) method to the button. (line no.16)
4) Bind a text object to the text layout identified by textEdit1. (line no.17)
5) Get the input value from the text object and convert the value to a string. (line no.18)
6) Display the string value using toast object. (line no.19)
6.4) Edit the codes as follows:
6.5) Error markers appear under certain keywords that are not recognized by Java compiler. However, Eclipse has a smart debugging function that is able to suggest corrections. In this example, choose the option to import the missing class.
6.6) Repeat the same technique to the other error markers. Do it carefully and ensure that you are choosing option to import class only.
6.7) Outcome:
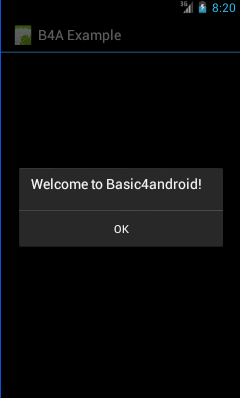
6.8) Run as Android Application…
6.9) Outcome: