.
100 Getting Started With Android Developer Tools
This tutorial series is about Android Apps Development using Android Developer Tools (ADT).
ADT version used for this tutorial is V.21.0.1 that includes Android Version 4.2 (API Level 17).
Google has stopped supporting ADT in favor of Android Studio.
Android Studio requires more spaces, resources and installation processes as compared to ADT which is actually a portable package that can be easily copied and pasted. ADT also runs on older machines with Win XP. Hence, ADT is more practical for beginners to quickly learn the concept and develop apps.
The materials for this tutorial are compatible with Android Studio. You can just import them into Android Studio and they should work. The codes, concepts and programming practices in general are the same.
|
1) Getting Started
If you do not have a copy of ADT, you can download it from here .
ADT requires Java SDK. Install Java JDK 1.7 before running ADT. Download JDK, http://www.oracle.com/technetwork/java/javase/downloads/jdk7-downloads-1880260.html .
Run ADT and check that you are running the right version.


2) Project Creation Wizard
2.1) Select menu File/New/Android Application Project

2.2) Type Application Name.
Give the name MySuperHero.
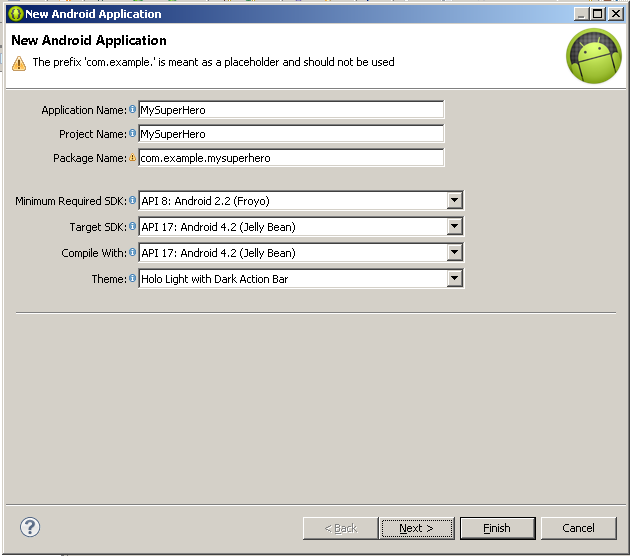
2.3) Configure Project.
Accept default.

2.4) Configure Launcher Icon
Accept defaults.

2.5) Create Activity
Accept defaults.

2.6) Create Blank Activity
Give a name SplashActivity.

Project Creation done.

3) Observe Important Files
3.1) AndroidManifest.xml
<?xml version="1.0" encoding="utf-8"?>
<manifest xmlns:android="http://schemas.android.com/apk/res/android"
package="com.example.mysuperhero"
android:versionCode="1"
android:versionName="1.0" >
<uses-sdk
android:minSdkVersion="8"
android:targetSdkVersion="17" />
<application
android:allowBackup="true"
android:icon="@drawable/ic_launcher"
android:label="@string/app_name"
android:theme="@style/AppTheme" >
<activity
android:name="com.example.mysuperhero.SplashActivity"
android:label="@string/app_name" >
<intent-filter>
<action android:name="android.intent.action.MAIN" />
<category android:name="android.intent.category.LAUNCHER" />
</intent-filter>
</activity>
</application>
</manifest>
|
3.2) SplashActivity.java
package com.example.mysuperhero;
import android.os.Bundle;
import android.app.Activity;
import android.view.Menu;
public class SplashActivity extends Activity {
@Override
protected void onCreate(Bundle savedInstanceState) {
super.onCreate(savedInstanceState);
setContentView(R.layout.activity_splash);
}
@Override
public boolean onCreateOptionsMenu(Menu menu) {
// Inflate the menu; this adds items to the action bar if it is present.
getMenuInflater().inflate(R.menu.activity_splash, menu);
return true;
}
}
|
3.3) res/layout/activity_splash.xml
<RelativeLayout xmlns:android="http://schemas.android.com/apk/res/android"
xmlns:tools="http://schemas.android.com/tools"
android:layout_width="match_parent"
android:layout_height="match_parent"
tools:context=".SplashActivity" >
<TextView
android:layout_width="wrap_content"
android:layout_height="wrap_content"
android:layout_centerHorizontal="true"
android:layout_centerVertical="true"
android:text="@string/hello_world" />
</RelativeLayout>
|
4) Android Emulator
Select menu File/Window/Android Virtual Device Manager.
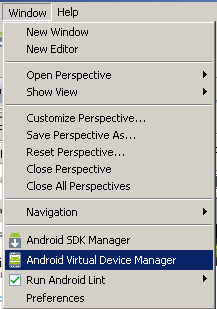
Click New...

AVD Name: WQVGA33
Device: 3.3” WQVGA
Target: Android 4.2 - API Level 17


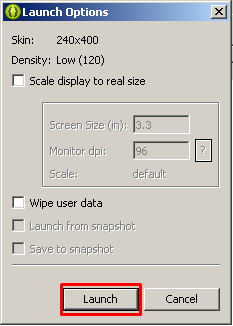

Wait until the emulator has fully loaded Android OS.

5) Running Android Apps on Emulator
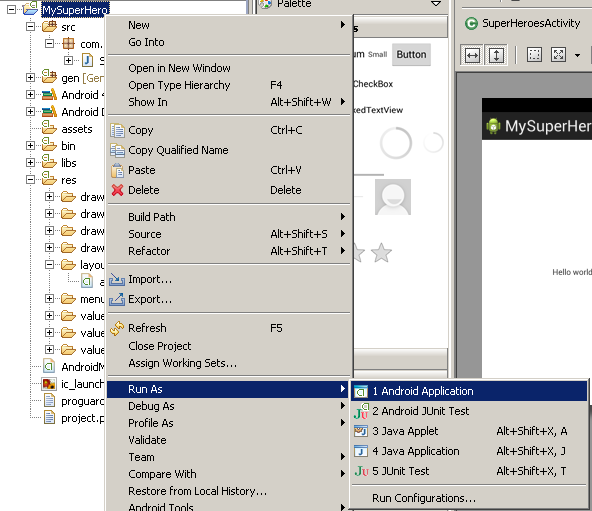
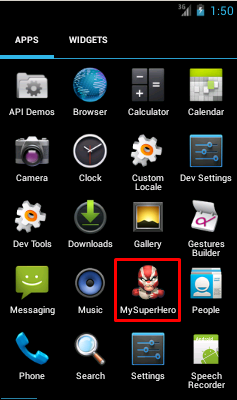
Right-click the project name, select Run As/Android Application.


6) App Icon
LDPI
|
MDPI
|
HDPI
|
XHDPI
|


Download the images above and replace the ic_launcher.png file in the folders below. Make sure that you save the correct image sizes to the respective folders.
|

OPTIONAL:
replace the file ic_launcher-web.png in the project root folder as well.
|


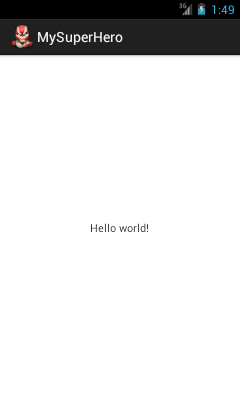
OUTCOME.
7) Image Resources
7.1) ImageView Resource
We can further modify the layout by adding the super hero image to the activity.
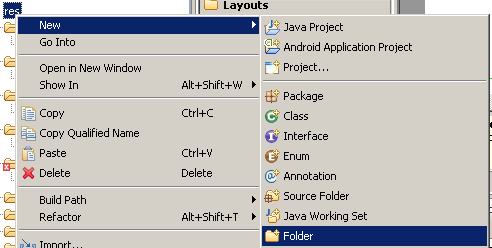
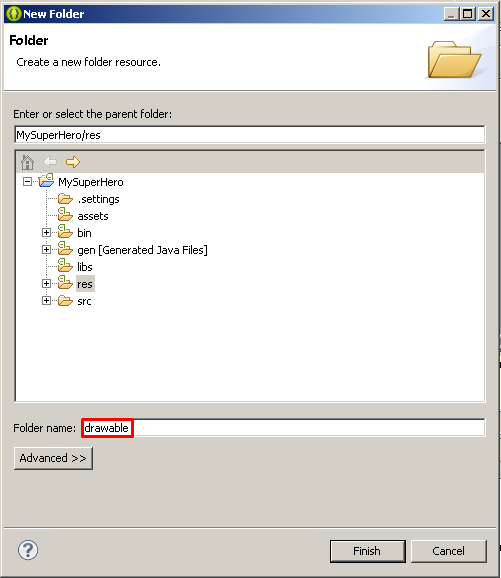
Create a new folder res/drawable.
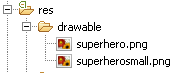
Put the image below as superhero.png.


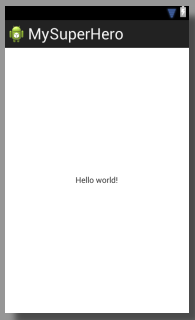
Add ImageView to the layout
File: res/layout/activity_splash.xml
<RelativeLayout xmlns:android="http://schemas.android.com/apk/res/android"
xmlns:tools="http://schemas.android.com/tools"
android:layout_width="match_parent"
android:layout_height="match_parent"
tools:context=".SplashActivity" >
<ImageView
android:layout_width="wrap_content"
android:layout_height="wrap_content"
android:background="@drawable/superhero"
android:layout_centerHorizontal="true"
android:layout_centerVertical="true" />
<TextView
android:layout_width="wrap_content"
android:layout_height="wrap_content"
android:layout_centerHorizontal="true"
android:layout_centerVertical="true"
android:text="@string/hello_world" />
</RelativeLayout>
|
OUTCOME.
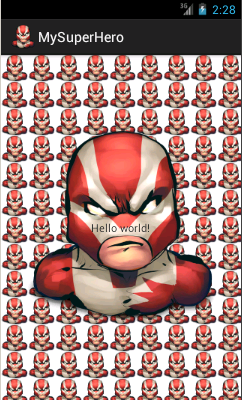
7.2) Layout Background Resource
Save the image below as res/drawable/superherosmall.png
Create a new drawable XML file.

Type the name repeatsuperherosmall

File:res/drawable/repeatsuperherosmall
<?xml version="1.0" encoding="utf-8"?>
<bitmap
xmlns:android="http://schemas.android.com/apk/res/android"
android:src="@drawable/superherosmall"
android:tileMode="repeat" />
|
Edit Layout file to insert repeatsuperherosmall drawable item.
File: res/layout/activity_splash.xml
<RelativeLayout xmlns:android="http://schemas.android.com/apk/res/android"
xmlns:tools="http://schemas.android.com/tools"
android:layout_width="match_parent"
android:layout_height="match_parent"
android:background="@drawable/repeatsuperherosmall"
tools:context=".SplashActivity" >
<ImageView
android:layout_width="wrap_content"
android:layout_height="wrap_content"
android:background="@drawable/superhero"
android:layout_centerHorizontal="true"
android:layout_centerVertical="true" />
<TextView
android:layout_width="wrap_content"
android:layout_height="wrap_content"
android:layout_centerHorizontal="true"
android:layout_centerVertical="true"
android:text="@string/hello_world" />
</RelativeLayout>
|
OUTCOME.

good posting.
ReplyDeleteAndroid Developer Tools