
.
102-Programmr: Edit Layout For Android
Android screen layout is defined by the xml files.
The files are stored in res/layout path.
These files later are called by controller files (java file) using the commandsetcontent(R.layout.main).
In the above code example, the name R and layout refers to the path res/layout and the namemain refers to the name of the layout file in xml format.
|
1) Startup files
Continue from the previous tutorial, http://android-steps.blogspot.my/2015/01/101-learn-android-on-programmr.html .
Check that you have these files.
File Name: AndroidManifest.xml
<?xml version="1.0" encoding="utf-8"?>
<manifest xmlns:android="http://schemas.android.com/apk/res/android"
package="com.example.MyAndroid"
android:versionCode="1"
android:versionName="1.0">
<application android:label="@string/app_name" android:icon="@drawable/ic_launcher">
<activity android:name="MyAndroid"
android:label="@string/app_name">
<intent-filter>
<action android:name="android.intent.action.MAIN" />
<category android:name="android.intent.category.LAUNCHER" />
</intent-filter>
</activity>
</application>
<uses-sdk android:minSdkVersion="8" />
</manifest>
|
File Name: MyAndroid.java
package com.example.MyAndroid;
import android.app.Activity;
import android.os.Bundle;
public class MyAndroid extends Activity
{
/** Called when the activity is first created. */
@Override
public void onCreate(Bundle savedInstanceState)
{
super.onCreate(savedInstanceState);
setContentView(R.layout.main);
}
}
|
FIle Name: res/layout/main.xml
<?xml version="1.0" encoding="utf-8"?>
<LinearLayout xmlns:android="http://schemas.android.com/apk/res/android"
android:orientation="vertical"
android:layout_width="fill_parent"
android:layout_height="fill_parent"
>
<TextView
android:layout_width="fill_parent"
android:layout_height="wrap_content"
android:text="Hello MyAndroid"
/>
</LinearLayout>
|
As mentioned in the previous tutorial, the easiest way to start coding Android projects is to code the xml files.
We will modify the xml files and observe the outcome of it
|
2) Layout File (XML file)
In this tutorial, the first layout file name is res/layout/main.xml.
Make it a practice to write in small letter words.
It is also recommended to add the prefix word “activity_” (so that it becomes activity_main.xml) as that is the way Android officially does if you use ADT or Android Studion. Probably to avoid confusion when the word “main” is used in many places.
|
Look at the first layout file.
FIle Name: res/layout/main.xml
<?xml version="1.0" encoding="utf-8"?>
<LinearLayout xmlns:android="http://schemas.android.com/apk/res/android"
android:orientation="vertical"
android:layout_width="fill_parent"
android:layout_height="fill_parent"
>
<TextView
android:layout_width="fill_parent"
android:layout_height="wrap_content"
android:text="Hello MyAndroid"
/>
</LinearLayout>
|
This layout file contains three xml tags.
The first xml tag is the standard identifier for xml document. It must be included on the first line.
The second tag is <LinearLayout>. It comes in pairs so take note that the other pair</LinearLayout> is located at the last line of the file.
The third tag is <TextView../>. This tag does not come in pair but take note that there is a slash before the character “>” at the end of the tag.
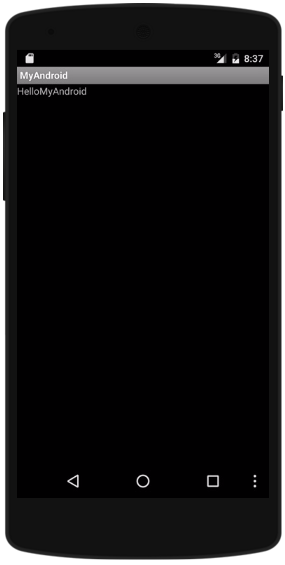
The TextView is a type of View Object. if you look at the Android Apps running in the emulator, the text Hello MyAndroid is defined in this tag. In other words, it is visible on the screen.
The LinearLayout is a type of ViewGroup. You do not see it on the screen but it defines how its containing objects (in this example TextView) to be displayed on the screen.
Notice that both elements contain the attributes android:layout_width andandroid:layout_height. These attributes must be defined so that Android knows how to put the ViewGroup or View Objects on the screen. fill_parent (now match_parent) means to follow the dimension of the containing parent. wrap_content means to set the size of the object according to its content size.
|
3) TextView
Modify the codes as follows so that you get two TextView objects
|
FIle Name: res/layout/main.xml
<?xml version="1.0" encoding="utf-8"?>
<LinearLayout xmlns:android="http://schemas.android.com/apk/res/android"
android:orientation="vertical"
android:layout_width="fill_parent"
android:layout_height="fill_parent"
>
<TextView
android:layout_width="fill_parent"
android:layout_height="wrap_content"
android:text="Hello"
/>
<TextView
android:layout_width="fill_parent"
android:layout_height="wrap_content"
android:text="MyAndroid"
/>
</LinearLayout>
|
OUTCOME.

The TextView objects are arranged in vertical direction.
|
4) LinearLayout and Layout Orientation
Modify the codes so that the orientation value is changed to horizontal.
Set the layout_width value to wrap_content.
|
FIle Name: res/layout/main.xml
<?xml version="1.0" encoding="utf-8"?>
<LinearLayout xmlns:android="http://schemas.android.com/apk/res/android"
android:orientation="horizontal"
android:layout_width="fill_parent"
android:layout_height="fill_parent"
>
<TextView
android:layout_width="wrap_content"
android:layout_height="wrap_content"
android:text="Hello"
/>
<TextView
android:layout_width="wrap_content"
android:layout_height="wrap_content"
android:text="MyAndroid"
/>
</LinearLayout>
|
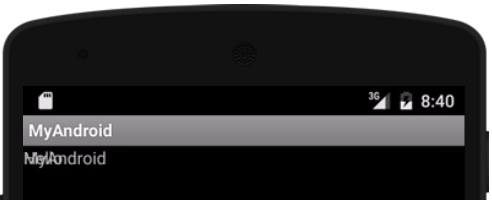
OUTCOME.
The TextView objects are arranged in horizontal direction.
We have to set the layout_width value to wrap_content otherwise we will not be able to see the second TextView object.
So now you know difference between horizontal and vertical orientation of LinearLayout.
|
5) RelativeLayout
Change the word LinearLayout to RelativeLayout.
Delete the android:orientation … attribute
|
<?xml version="1.0" encoding="utf-8"?>
<RelativeLayout xmlns:android="http://schemas.android.com/apk/res/android"
android:layout_width="fill_parent"
android:layout_height="fill_parent"
>
<TextView
android:layout_width="wrap_content"
android:layout_height="wrap_content"
android:text="Hello"
/>
<TextView
android:layout_width="wrap_content"
android:layout_height="wrap_content"
android:text="MyAndroid"
/>
</RelativeLayout>
|
OUTCOME.
Notice that both TextView objects are positioned at the same location.
This is because they were not defined with location values.
|
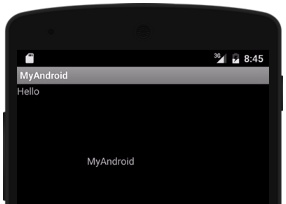
Add android:layout_marginTop and android:layout_marginLeft attributes to the second TextView.
|
<?xml version="1.0" encoding="utf-8"?>
<RelativeLayout xmlns:android="http://schemas.android.com/apk/res/android"
android:layout_width="fill_parent"
android:layout_height="fill_parent"
>
<TextView
android:layout_width="wrap_content"
android:layout_height="wrap_content"
android:text="Hello"
/>
<TextView
android:layout_width="wrap_content"
android:layout_height="wrap_content"
android:layout_marginTop="100dp"
android:layout_marginLeft="100dp"
android:text="MyAndroid"
/>
</RelativeLayout>
|
OUTCOME.
6) Button
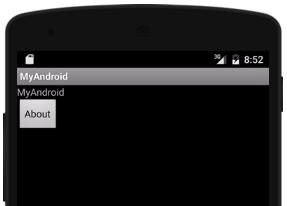
We will rearrange our layout now.
Set the ViewGroup to be a LinearLayout with vertical orientation.
Add a TextView with “MyAndroid” text.
Add a button with “About” text.
|
<?xml version="1.0" encoding="utf-8"?>
<LinearLayout xmlns:android="http://schemas.android.com/apk/res/android"
android:orientation="vertical"
android:layout_width="fill_parent"
android:layout_height="fill_parent"
>
<TextView
android:layout_width="wrap_content"
android:layout_height="wrap_content"
android:text="MyAndroid"
/>
<Button
android:layout_width="wrap_content"
android:layout_height="wrap_content"
android:text="About"
/>
</LinearLayout>
|
OUTCOME.
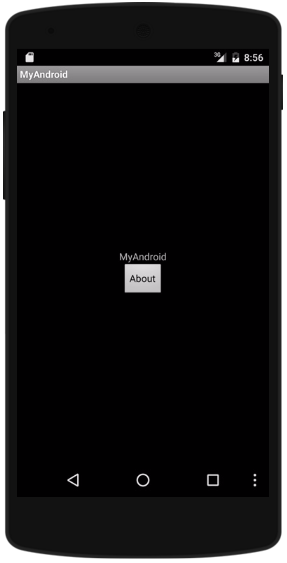
7) Gravity
We use the attribute android:gravity to align the objects of a ViewGroup in relation to the screen dimension.
The value center will put the objects at the center of the ViewGroup space.
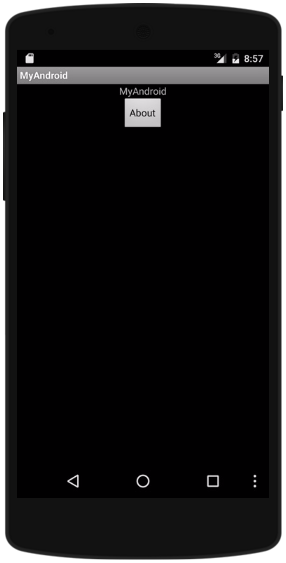
The value center_horizontal will put the objects at the horizontal center of the ViewGroup space.
|
<?xml version="1.0" encoding="utf-8"?>
<LinearLayout xmlns:android="http://schemas.android.com/apk/res/android"
android:orientation="vertical"
android:layout_width="fill_parent"
android:layout_height="fill_parent"
android:gravity="center"
>
<TextView
android:layout_width="wrap_content"
android:layout_height="wrap_content"
android:text="MyAndroid"
/>
<Button
android:layout_width="wrap_content"
android:layout_height="wrap_content"
android:text="About"
/>
</LinearLayout>
|
OUTCOME.
<?xml version="1.0" encoding="utf-8"?>
<LinearLayout xmlns:android="http://schemas.android.com/apk/res/android"
android:orientation="vertical"
android:layout_width="fill_parent"
android:layout_height="fill_parent"
android:gravity="center_horizontal"
>
<TextView
android:layout_width="wrap_content"
android:layout_height="wrap_content"
android:text="MyAndroid"
/>
<Button
android:layout_width="wrap_content"
android:layout_height="wrap_content"
android:text="About"
/>
</LinearLayout>
|
OUTCOME.
8) Nested Layout
We can put a ViewGroup inside another ViewGroup
|
<?xml version="1.0" encoding="utf-8"?>
<LinearLayout xmlns:android="http://schemas.android.com/apk/res/android"
android:orientation="vertical"
android:layout_width="fill_parent"
android:layout_height="fill_parent"
android:gravity="center_horizontal"
>
<TextView
android:layout_width="wrap_content"
android:layout_height="wrap_content"
android:text="MyAndroid"
/>
<LinearLayout xmlns:android="http://schemas.android.com/apk/res/android"
android:orientation="horizontal"
android:layout_width="fill_parent"
android:layout_height="fill_parent"
android:gravity="center_horizontal"
>
<Button
android:layout_width="wrap_content"
android:layout_height="wrap_content"
android:text="About"
/>
<Button
android:layout_width="wrap_content"
android:layout_height="wrap_content"
android:text="Settings"
/>
</LinearLayout>
</LinearLayout>
|
OUTCOME.

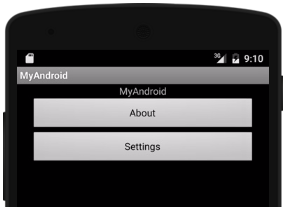
9) Margins
Margins define the gap between the objects are their parents.
Change the value layout_width to match_parent for the LinearLayouts and buttons.
Add margins to the inner LinearLayout.
|
<?xml version="1.0" encoding="utf-8"?>
<LinearLayout xmlns:android="http://schemas.android.com/apk/res/android"
android:orientation="vertical"
android:layout_width="match_parent"
android:layout_height="match_parent"
android:gravity="center_horizontal"
>
<TextView
android:layout_width="wrap_content"
android:layout_height="wrap_content"
android:text="MyAndroid"
/>
<LinearLayout xmlns:android="http://schemas.android.com/apk/res/android"
android:orientation="vertical"
android:layout_width="match_parent"
android:layout_height="match_parent"
android:layout_marginLeft="20dp"
android:layout_marginRight="20dp"
>
<Button
android:layout_width="match_parent"
android:layout_height="wrap_content"
android:text="About"
/>
<Button
android:layout_width="match_parent"
android:layout_height="wrap_content"
android:text="Settings"
/>
</LinearLayout>
</LinearLayout>
|
OUTCOME.
No comments:
Post a Comment