.
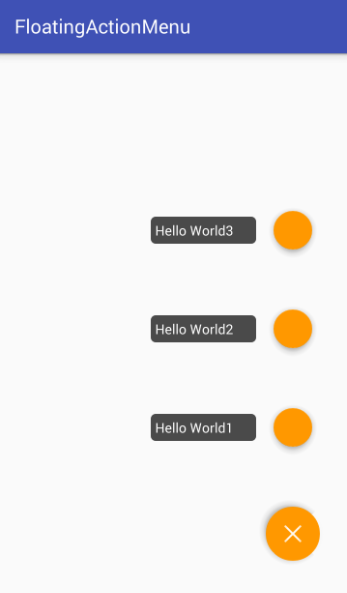
How To Add Floating Action Menu Library (TristanWiley)
This tutorial is based on the Floating Action Menu Library available at https://github.com/TristanWiley/FloatingActionMenu .
2) Unzip the package and find the folder "library".
3) Run Android Studio and create a new project.
4) In Android Studio, go to menu File/New/Import Module…
5) Select the "library" folder in the downloaded package.
6) Add an item to your dependencies section, e.g in build.gradle (module:app)
dependencies {
...
compile project(':library')
}
|
Dependencies section example .
7) Start working on your project.
8) If you are not sure on where to start, copy the sample folder to your project.
8a) Android Manifest
<?xml version="1.0" encoding="utf-8"?>
<manifest package="terranovaproductions.newcomicreader.sample"
xmlns:android="http://schemas.android.com/apk/res/android">
<application
android:allowBackup="true"
android:icon="@mipmap/ic_launcher"
android:label="@string/app_name"
android:supportsRtl="true"
android:theme="@style/AppTheme">
<activity android:name=".MainActivity">
<intent-filter>
<action android:name="android.intent.action.MAIN" />
<category android:name="android.intent.category.LAUNCHER" />
</intent-filter>
</activity>
</application>
</manifest>
|
8b) Res files
8c) MainActivity.java
package terranovaproductions.newcomicreader.sample;
import android.support.v7.app.AppCompatActivity;
import android.os.Bundle;
public class MainActivity extends AppCompatActivity {
@Override
protected void onCreate(Bundle savedInstanceState) {
super.onCreate(savedInstanceState);
setContentView(R.layout.activity_main);
}
}
|
.

Thanx!
ReplyDelete