Sunday, March 1, 2015

107-How To Add Android Activity


.
107-Creating Second Activity
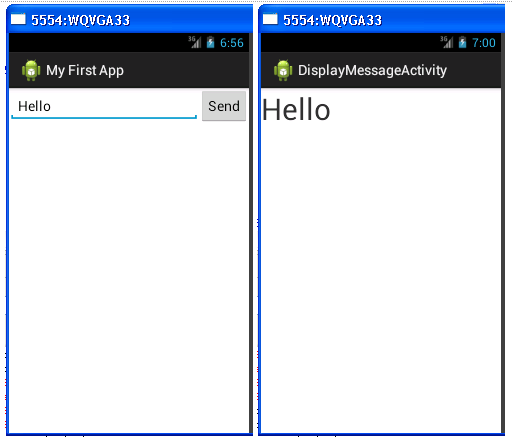
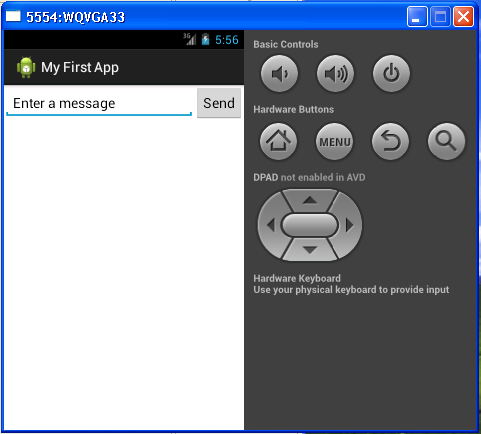
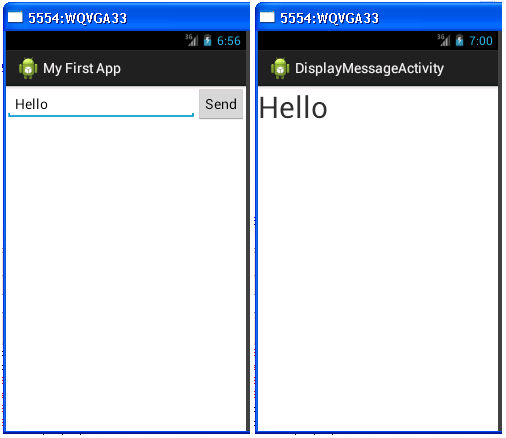
In this lesson, you’ll add some code to MainActivitythat starts a new activity when the user clicks the Send button.

1) Run ADT and open My First App project

Create a new project MyFirstApp.
or
Download MyFirstApp Project here:

2) Add a Java Method Call to Send Button

To respond to the button's on-click event, add the android:onClick attribute to the <Button> element in the layout file.
<LinearLayout xmlns:android="http://schemas.android.com/apk/res/android"
    xmlns:tools="http://schemas.android.com/tools"
    android:layout_width="match_parent"
    android:layout_height="match_parent"
    android:orientation="horizontal"
    tools:context=".MainActivity" >
    <EditText
         android:layout_weight="1"
        android:layout_width="0dp"
        android:layout_height="wrap_content"
        android:hint="@string/edit_message" />
    <Button
        android:layout_width="wrap_content"
        android:layout_height="wrap_content"
        android:text="@string/button_send"
        android:onClick="sendMessage" />
</LinearLayout>

3) Add a Java Method to MainActivity Class

package com.example.myfirstapp;
import android.os.Bundle;
import android.app.Activity;
import android.util.Log;
import android.view.Menu;
import android.view.View;
public class MainActivity extends Activity {
    @Override
    protected void onCreate(Bundle savedInstanceState) {
        super.onCreate(savedInstanceState);
        setContentView(R.layout.activity_main);
    }
    @Override
    public boolean onCreateOptionsMenu(Menu menu) {
        // Inflate the menu; this adds items to the action bar if it is present.
        getMenuInflater().inflate(R.menu.activity_main, menu);
        return true;
    }
    /** Called when the user clicks the Send button */
    public void sendMessage(View view) {
        // Do something in response to button
        Log.v("Click","Send Button is clicked");
    } 
}
You need to import the following classes…
import android.util.Log;
import android.view.View;

4) Run and Observe LogCat Window

5) Create a Second Activity

5.1) Go to menu. Select File/New/Other… (since Android Activity is not listed in menu)
5.2) In the New Dialog Window, Select Android/Android Activity.
5.3) Choose Blank Activity
5.4) Type the name DisplayMessageActivity
Click Finish.

6) Pass the control from MainActivity to SecondActivity

Edit MainActivity by adding an Intent Object and a method call “startActivity”.
package com.example.myfirstapp;
import android.os.Bundle;
import android.app.Activity;
import android.util.Log;
import android.view.Menu;
import android.view.View;
public class MainActivity extends Activity {
    @Override
    protected void onCreate(Bundle savedInstanceState) {
        super.onCreate(savedInstanceState);
        setContentView(R.layout.activity_main);
    }
    @Override
    public boolean onCreateOptionsMenu(Menu menu) {
        // Inflate the menu; this adds items to the action bar if it is present.
        getMenuInflater().inflate(R.menu.activity_main, menu);
        return true;
    }
    /** Called when the user clicks the Send button */
    public void sendMessage(View view) {
        // Do something in response to button
        Log.v("Click","Send Button is clicked");
        Intent intent = new Intent(this, DisplayMessageActivity.class);
        startActivity(intent);
    }
}
You need to import the following classes…
import android.content.Intent;

7) Capture string input and pass to Second Activity

7.1) Give an id to the EditText object
edit the layout by giving the id property to EditText.
<LinearLayout xmlns:android="http://schemas.android.com/apk/res/android"
    xmlns:tools="http://schemas.android.com/tools"
    android:layout_width="match_parent"
    android:layout_height="match_parent"
    android:orientation="horizontal"
    tools:context=".MainActivity" >
    <EditText
        android:id="@+id/edit_message"
        android:layout_weight="1"
        android:layout_width="0dp"
        android:layout_height="wrap_content"
        android:hint="@string/edit_message" />
    <Button
        android:layout_width="wrap_content"
        android:layout_height="wrap_content"
        android:text="@string/button_send"
        android:onClick="sendMessage" />
</LinearLayout>
7.2) Update the MainActivity Class to capture input and pass to intent object.
package com.example.myfirstapp;
import android.os.Bundle;
import android.app.Activity;
import android.content.Intent;
import android.util.Log;
import android.view.Menu;
import android.view.View;
public class MainActivity extends Activity {
    @Override
    protected void onCreate(Bundle savedInstanceState) {
        super.onCreate(savedInstanceState);
        setContentView(R.layout.activity_main);
    }
    @Override
    public boolean onCreateOptionsMenu(Menu menu) {
        // Inflate the menu; this adds items to the action bar if it is present.
        getMenuInflater().inflate(R.menu.activity_main, menu);
        return true;
    }
    /** Called when the user clicks the Send button */
    public void sendMessage(View view) {
        // Do something in response to button
        Log.v("Click","Send Button is clicked");
        Intent intent = new Intent(this, DisplayMessageActivity.class);
        EditText editText = (EditText) findViewById(R.id.edit_message);
        String message = editText.getText().toString();
        intent.putExtra(EXTRA_MESSAGE, message);      
        startActivity(intent);
    }
}
You need to…
1) import android.widget.EditText;
2) Add a public static final String constant
        public static final String EXTRA_MESSAGE = "com.example.myfirstapp.MESSAGE";
example:
public=it is accessible from outside of class
final=it cannot be changed
static=it will be created once and therefore doesn’t require instantiation.
The startActivity call can be written as a single line statement as follows
startActivity(new Intent(this, DisplayMessageActivity.class));

8) Update DisplayMessageActivity Class

package com.example.myfirstapp;
import android.os.Bundle;
import android.app.Activity;
import android.content.Intent;
import android.view.Menu;
import android.widget.TextView;
public class DisplayMessageActivity extends Activity {
        @Override
        protected void onCreate(Bundle savedInstanceState) {
                super.onCreate(savedInstanceState);
                setContentView(R.layout.activity_display_message);
             // Get the message from the intent
             Intent intent = getIntent();
             String message = intent.getStringExtra(MainActivity.EXTRA_MESSAGE);
             // Create the text view
             TextView textView = new TextView(this);
             textView.setTextSize(40);
             textView.setText(message);
             // Set the text view as the activity layout
             setContentView(textView);
        }
        @Override
        public boolean onCreateOptionsMenu(Menu menu) {
                // Inflate the menu; this adds items to the action bar if it is present.
                getMenuInflater().inflate(R.menu.activity_display_message, menu);
                return true;
        }
}
You need to…
1) import android.content.Intent;
2) import android.widget.TextView;

9) Run

DOWNLOAD


.

106-How To Create Android Toast


.
106-Android Toast
A toast provides simple feedback about an operation in a small popup. It only fills the amount of space required for the message and the current activity remains visible and interactive. For example, navigating away from an email before you send it triggers a "Draft saved" toast to let you know that you can continue editing later. Toasts automatically disappear after a timeout.
If user response to a status message is required, consider instead using a Notification.

Creating a simple Toast

1) Run ADT and open My First App project

Create a new project MyFirstApp.
or
Download MyFirstApp Project here:

2) Edit Resource Files

2.1) Strings

File: res/values/strings.xml

<?xml version="1.0" encoding="utf-8"?>
<resources>
    <string name="app_name">My First App</string>
    <string name="edit_message">Enter a message</string>
    <string name="button_send">Send</string>
    <string name="action_settings">Settings</string>
    <string name="title_activity_main">MainActivity</string>
    <string name="menu_settings">Settings</string>
</resources>
2.2) Layout
File: res/values/activity_main.xml

<LinearLayout
    xmlns:android="http://schemas.android.com/apk/res/android"
    xmlns:tools="http://schemas.android.com/tools"
    android:layout_width="match_parent"
    android:layout_height="match_parent"
    android:orientation="horizontal"
    tools:context=".MainActivity" >
    <EditText
        android:layout_weight="1"
        android:layout_width="0dp"
        android:layout_height="wrap_content"
        android:hint="@string/edit_message" />
    <Button
        android:layout_width="wrap_content"
        android:layout_height="wrap_content"
        android:text="@string/button_send"
        android:onClick="sendMessage" />
</LinearLayout>

2) Edit MainActivity.java

File:MainActivity.java

package com.example.myfirstapp;
import android.os.Bundle;
import android.app.Activity;
import android.view.Menu;
import android.view.View;
import android.widget.Toast;
public class MainActivity extends Activity {
        @Override
        protected void onCreate(Bundle savedInstanceState) {
                super.onCreate(savedInstanceState);
                setContentView(R.layout.activity_main);
        }
        @Override
        public boolean onCreateOptionsMenu(Menu menu) {
                // Inflate the menu; this adds items to the action bar if it is present.
                getMenuInflater().inflate(R.menu.activity_main, menu);
                return true;
        }
        public void sendMessage(View v){
                //display in long period of time
                Toast.makeText(getApplicationContext(), "Send Message", Toast.LENGTH_LONG).show();
        }
}

If you want to display a short toast, change as follows
Toast.makeText(getApplicationContext(), "Send Message", Toast.LENGTH_SHORT).show();
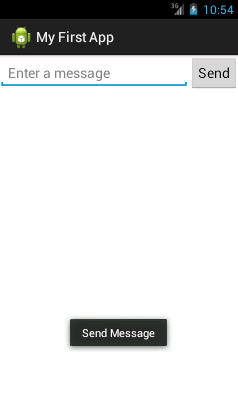
OUTCOME.

DOWNLOAD

REFERENCE


.

105-How To Create Android Layout


.
105-Building Android Simple User Interface
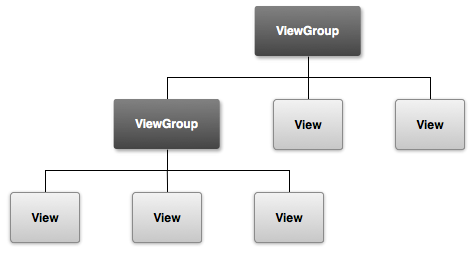
The graphical user interface for an Android app is built using a hierarchy of View and ViewGroup objects. View objects are usually UI widgets such as buttons or text fields and ViewGroup objects are invisible view containers that define how the child views are laid out, such as in a grid or a vertical list.
Android provides an XML vocabulary that corresponds to the subclasses of View and ViewGroup so you can define your UI in XML using a hierarchy of UI elements.
Figure 1. Illustration of how ViewGroup objects form branches in the layout and contain other View objects.
In this lesson, you'll create a layout in XML that includes a text field and a button. In the following lesson, you'll respond when the button is pressed by sending the content of the text field to another activity.

1) Run ADT and open My First App project

Download MyFirstApp Project here:

2) Open MainActivity.Java

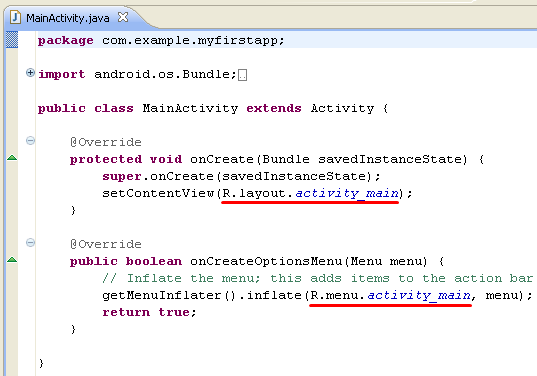
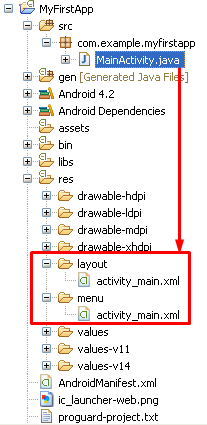
Notice that MainActivity loads two xml files; R.layout.activity_main and R.menu.activity_main
The file names are similar so be careful not to mix up between them.

3) activity_main layout file

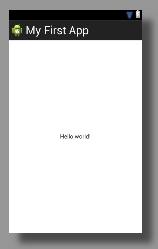
The following is the default codes.
(You may choose to edit this file using Graphical Layout mode. However, source code editing gives you more control on the actual codes).
<RelativeLayout xmlns:android="http://schemas.android.com/apk/res/android"
    xmlns:tools="http://schemas.android.com/tools"
    android:layout_width="match_parent"
    android:layout_height="match_parent"
    tools:context=".MainActivity" >
    <TextView
        android:layout_width="wrap_content"
        android:layout_height="wrap_content"
        android:layout_centerHorizontal="true"
        android:layout_centerVertical="true"
        android:text="@string/hello_world" />
</RelativeLayout>
3.1) Change Root View to LinearLayout
notice that we are setting it as horizontal layout, ie child objects will be arranged in horizontal flow.
<LinearLayout xmlns:android="http://schemas.android.com/apk/res/android"
    xmlns:tools="http://schemas.android.com/tools"
    android:layout_width="match_parent"
    android:layout_height="match_parent"
    android:orientation="horizontal" 
    tools:context=".MainActivity" >
    <TextView
        android:layout_width="wrap_content"
        android:layout_height="wrap_content"
        android:layout_centerHorizontal="true"
        android:layout_centerVertical="true"
        android:text="@string/hello_world" />
</LinearLayout>
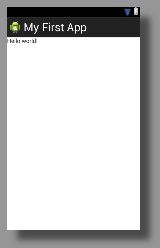
As a result, the text Hello World is re-positioned to the top left of the screen. Its parameter settings become invalid as the LinearLayout has overridden them.
3.2) Update the TextView Object.
<LinearLayout xmlns:android="http://schemas.android.com/apk/res/android"
    xmlns:tools="http://schemas.android.com/tools"
    android:layout_width="match_parent"
    android:layout_height="match_parent"
    android:orientation="horizontal" 
    tools:context=".MainActivity" >
    <TextView
        android:layout_width="wrap_content"
        android:layout_height="wrap_content"
        android:layout_centerHorizontal="true"
        android:layout_centerVertical="true"
        android:text="@string/hello_world" />
</LinearLayout>
3.3) Update the string values
Notice that the string variable hello_world in the example above is defined in the string file.
<?xml version="1.0" encoding="utf-8"?>
<resources>
    <string name="app_name">My First App</string>
    <string name="hello_world">Hello world!</string>
    <string name="menu_settings">Settings</string>
</resources>
Change the xml file as follows
<?xml version="1.0" encoding="utf-8"?>
<resources>
    <string name="app_name">My First App</string>
    <string name="hello_world">Hello world!</string>
    <string name="edit_message">Enter a message</string>
    <string name="button_send">Send</string>
    <string name="action_settings">Settings</string>
    <string name="title_activity_main">MainActivity</string>
    <string name="menu_settings">Settings</string>
</resources>
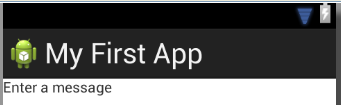
3.4) Update the TextView Object with new variable name
<LinearLayout xmlns:android="http://schemas.android.com/apk/res/android"
    xmlns:tools="http://schemas.android.com/tools"
    android:layout_width="match_parent"
    android:layout_height="match_parent"
    android:orientation="horizontal"
    tools:context=".MainActivity" >
    <TextView
        android:layout_width="wrap_content"
        android:layout_height="wrap_content"
        android:text="@string/edit_message" />
</LinearLayout>
Outcome.
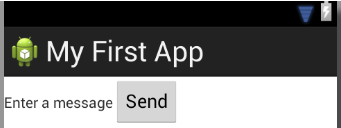
3.5) Add a Button to the layout.
<LinearLayout xmlns:android="http://schemas.android.com/apk/res/android"
    xmlns:tools="http://schemas.android.com/tools"
    android:layout_width="match_parent"
    android:layout_height="match_parent"
    android:orientation="horizontal"
    tools:context=".MainActivity" >
    <TextView
        android:layout_width="wrap_content"
        android:layout_height="wrap_content"
        android:text="@string/edit_message" />
    <Button
        android:layout_width="wrap_content"
        android:layout_height="wrap_content"
        android:text="@string/button_send" />
</LinearLayout>
Outcome.
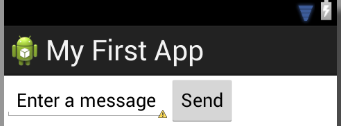
3.6) Change TextView to EditText.
<LinearLayout xmlns:android="http://schemas.android.com/apk/res/android"
    xmlns:tools="http://schemas.android.com/tools"
    android:layout_width="match_parent"
    android:layout_height="match_parent"
    android:orientation="horizontal"
    tools:context=".MainActivity" >
    <EditText
        android:layout_width="wrap_content"
        android:layout_height="wrap_content"
        android:hint="@string/edit_message" />
    <Button
        android:layout_width="wrap_content"
        android:layout_height="wrap_content"
        android:text="@string/button_send" />
</LinearLayout>
Outcome.
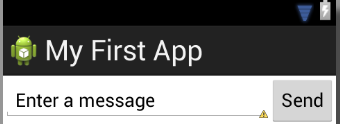
3.7) Change the weight and width property of EditText object.
<LinearLayout xmlns:android="http://schemas.android.com/apk/res/android"
    xmlns:tools="http://schemas.android.com/tools"
    android:layout_width="match_parent"
    android:layout_height="match_parent"
    android:orientation="horizontal"
    tools:context=".MainActivity" >
    <EditText
         android:layout_weight="1"
        android:layout_width="0dp"
        android:layout_width="wrap_content"
        android:layout_height="wrap_content"
        android:hint="@string/edit_message" />
    <Button
        android:layout_width="wrap_content"
        android:layout_height="wrap_content"
        android:text="@string/button_send" />
</LinearLayout>
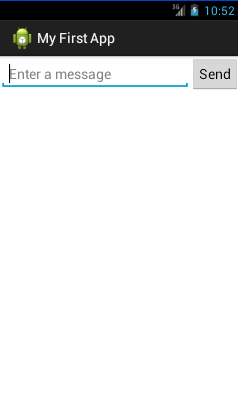
Outcome.

4) Final Output


.