---
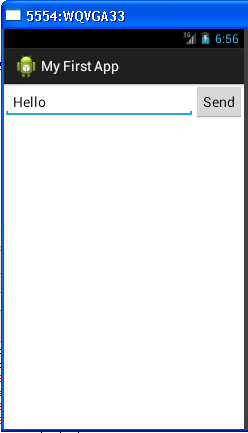
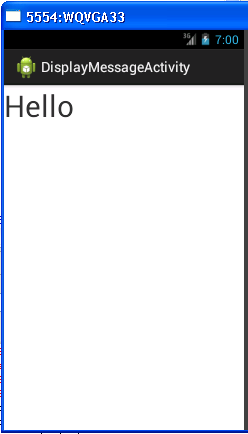
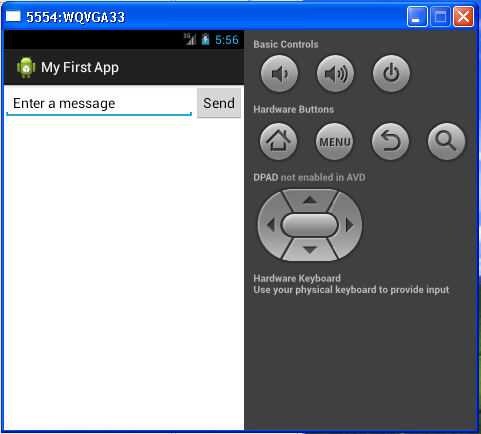
In this lesson, you’ll add some code to MainActivitythat starts a new activity when the user clicks the Send button.
(This tutorial is based on http://developer.android.com/training/basics/firstapp/starting-activity.html )
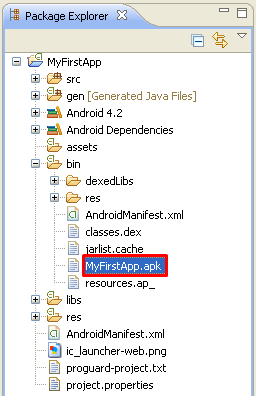
1) Run ADT and open My First App project
2) Add a Java Method Call to Send Button
To respond to the button's on-click event, add the android:onClick attribute to the <Button> element in the layout file.
<LinearLayout xmlns:android="http://schemas.android.com/apk/res/android"
xmlns:tools="http://schemas.android.com/tools"
android:layout_width="match_parent"
android:layout_height="match_parent"
android:orientation="horizontal"
tools:context=".MainActivity" >
<EditText
android:layout_weight="1"
android:layout_width="0dp"
android:layout_height="wrap_content"
android:hint="@string/edit_message" />
<Button
android:layout_width="wrap_content"
android:layout_height="wrap_content"
android:text="@string/button_send"
android:onClick="sendMessage" />
</LinearLayout>
|
3) Add a Java Method to MainActivity Class
package com.example.myfirstapp;
import android.os.Bundle;
import android.app.Activity;
import android.util.Log;
import android.view.Menu;
import android.view.View;
public class MainActivity extends Activity {
@Override
protected void onCreate(Bundle savedInstanceState) {
super.onCreate(savedInstanceState);
setContentView(R.layout.activity_main);
}
@Override
public boolean onCreateOptionsMenu(Menu menu) {
// Inflate the menu; this adds items to the action bar if it is present.
getMenuInflater().inflate(R.menu.activity_main, menu);
return true;
}
/** Called when the user clicks the Send button */
public void sendMessage(View view) {
// Do something in response to button
Log.v("Click","Send Button is clicked");
}
}
|
You need to import the following classes…
import android.util.Log;
import android.view.View;
|
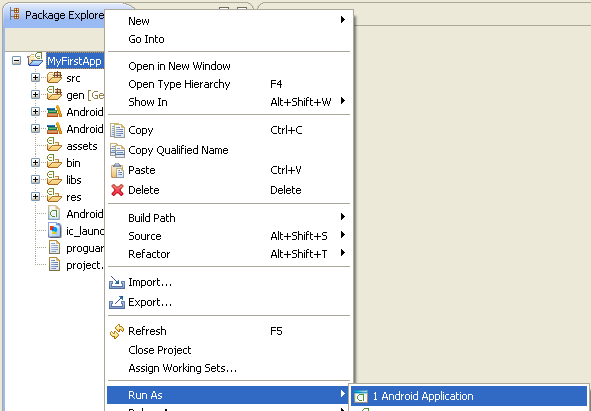
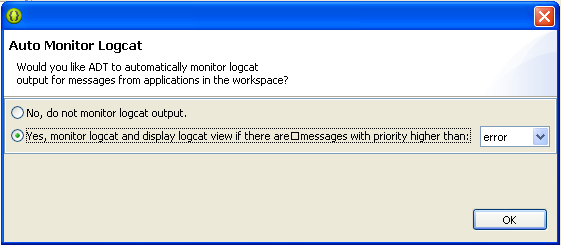
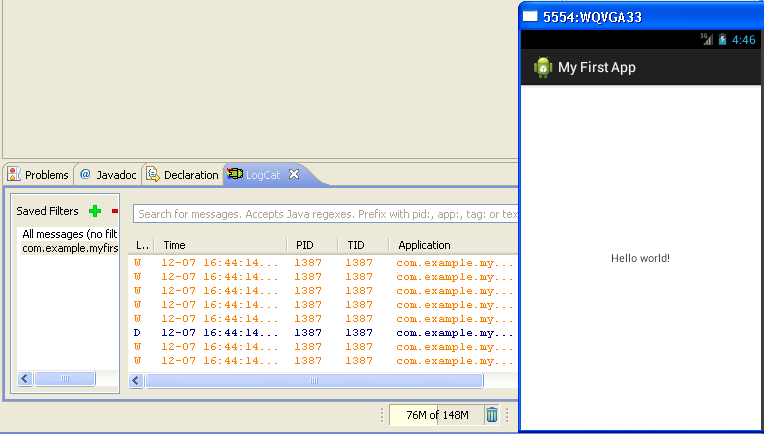
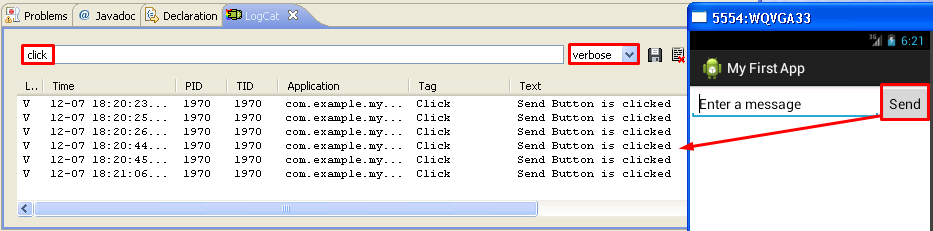
4) Run and Observe LogCat Window
5) Create a Second Activity
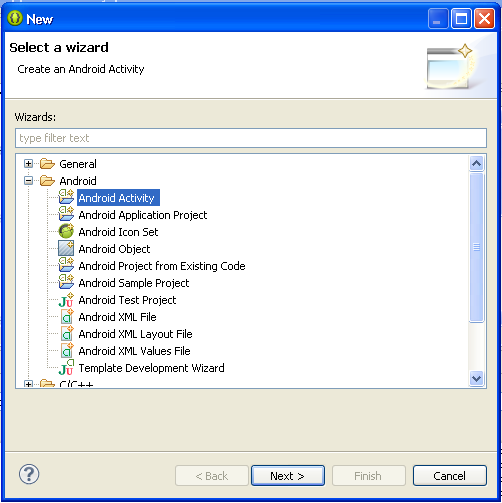
5.1) Go to menu. Select File/New/Other… (since Android Activity is not listed in menu)
5.2) In the New Dialog Window, Select Android/Android Activity.
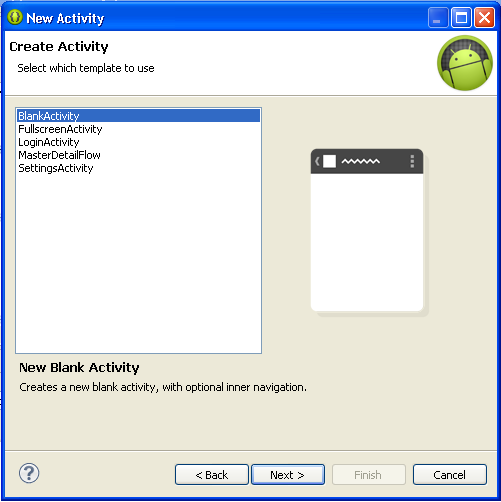
5.3) Choose Blank Activity
5.4) Type the name DisplayMessageActivity
Click Finish.
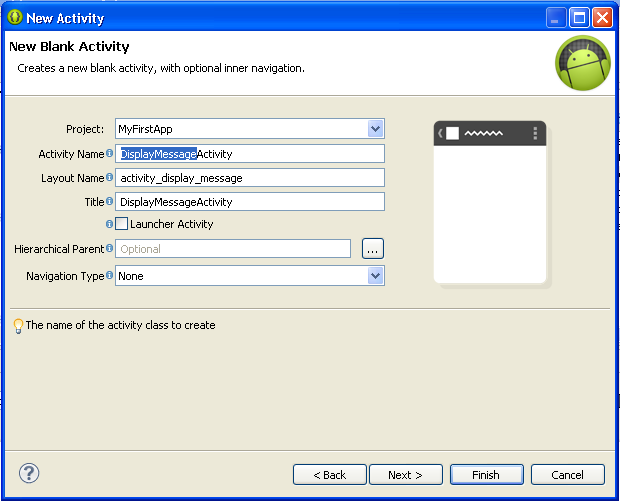
6) Pass the control from MainActivity to SecondActivity
Edit MainActivity by adding an Intent Object and a method call “startActivity”.
package com.example.myfirstapp;
import android.os.Bundle;
import android.app.Activity;
import android.util.Log;
import android.view.Menu;
import android.view.View;
public class MainActivity extends Activity {
@Override
protected void onCreate(Bundle savedInstanceState) {
super.onCreate(savedInstanceState);
setContentView(R.layout.activity_main);
}
@Override
public boolean onCreateOptionsMenu(Menu menu) {
// Inflate the menu; this adds items to the action bar if it is present.
getMenuInflater().inflate(R.menu.activity_main, menu);
return true;
}
/** Called when the user clicks the Send button */
public void sendMessage(View view) {
// Do something in response to button
Log.v("Click","Send Button is clicked");
Intent intent = new Intent(this, DisplayMessageActivity.class);
startActivity(intent);
}
}
|
You need to import the following classes…
import android.content.Intent;
|
7) Capture string input and pass to Second Activity
7.1) Give an id to the EditText object
edit the layout by giving the id property to EditText.
<LinearLayout xmlns:android="http://schemas.android.com/apk/res/android"
xmlns:tools="http://schemas.android.com/tools"
android:layout_width="match_parent"
android:layout_height="match_parent"
android:orientation="horizontal"
tools:context=".MainActivity" >
<EditText
android:id="@+id/edit_message"
android:layout_weight="1"
android:layout_width="0dp"
android:layout_height="wrap_content"
android:hint="@string/edit_message" />
<Button
android:layout_width="wrap_content"
android:layout_height="wrap_content"
android:text="@string/button_send"
android:onClick="sendMessage" />
</LinearLayout>
|
7.2) Update the MainActivity Class to capture input and pass to intent object.
package com.example.myfirstapp;
import android.os.Bundle;
import android.app.Activity;
import android.content.Intent;
import android.util.Log;
import android.view.Menu;
import android.view.View;
public class MainActivity extends Activity {
@Override
protected void onCreate(Bundle savedInstanceState) {
super.onCreate(savedInstanceState);
setContentView(R.layout.activity_main);
}
@Override
public boolean onCreateOptionsMenu(Menu menu) {
// Inflate the menu; this adds items to the action bar if it is present.
getMenuInflater().inflate(R.menu.activity_main, menu);
return true;
}
/** Called when the user clicks the Send button */
public void sendMessage(View view) {
// Do something in response to button
Log.v("Click","Send Button is clicked");
Intent intent = new Intent(this, DisplayMessageActivity.class);
EditText editText = (EditText) findViewById(R.id.edit_message);
String message = editText.getText().toString();
intent.putExtra(EXTRA_MESSAGE, message);
startActivity(intent);
}
}
|
You need to…
1) import android.widget.EditText;
2) Add a public final static String variable
public final static String EXTRA_MESSAGE = "com.example.myfirstapp.MESSAGE";
example:
public=it is accessible from outside of class
final=it cannot be changed
static=it will be created once and therefore doesn’t require instantiation
|

8) Update DisplayMessageActivity Class
package com.example.myfirstapp;
import android.os.Bundle;
import android.app.Activity;
import android.view.Menu;
public class DisplayMessageActivity extends Activity {
@Override
protected void onCreate(Bundle savedInstanceState) {
super.onCreate(savedInstanceState);
setContentView(R.layout.activity_display_message);
// Get the message from the intent
Intent intent = getIntent();
String message = intent.getStringExtra(MainActivity.EXTRA_MESSAGE);
// Create the text view
TextView textView = new TextView(this);
textView.setTextSize(40);
textView.setText(message);
// Set the text view as the activity layout
setContentView(textView);
}
@Override
public boolean onCreateOptionsMenu(Menu menu) {
// Inflate the menu; this adds items to the action bar if it is present.
getMenuInflater().inflate(R.menu.activity_display_message, menu);
return true;
}
}
|
You need to…
1) import android.content.Intent;
2) import android.widget.TextView;
|
9) Run